-
Table of Contents
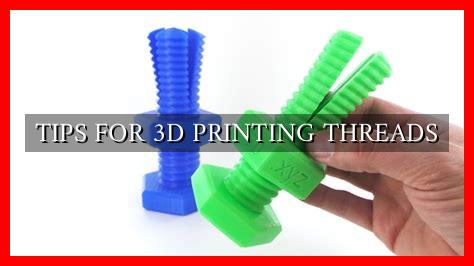
TIPS FOR 3D PRINTING THREADS
Introduction
3D printing has revolutionized the manufacturing industry by allowing for the creation of complex and customized parts with ease. One of the key challenges in 3D printing is creating threads that are strong, accurate, and functional. In this article, we will explore some tips and best practices for 3D printing threads to help you achieve optimal results.
Choose the Right Design Software
Before you start 3D printing threads, it is essential to use the right design software. Software like Fusion 360, SolidWorks, or Tinkercad can help you create precise and accurate thread designs. These tools offer features that allow you to customize thread profiles, pitch, and depth, ensuring that your threads fit perfectly with mating parts.
Select the Right Material
The choice of material plays a crucial role in the strength and durability of 3D printed threads.
. Some materials, such as ABS and PLA, are more prone to warping and may not be suitable for creating threads that require high precision. On the other hand, materials like PETG, Nylon, or Polycarbonate offer better strength and flexibility, making them ideal for 3D printing threads.
Optimize Printing Settings
When 3D printing threads, it is important to optimize your printing settings to achieve the best results. Adjust parameters such as layer height, infill density, and print speed to ensure that your threads are printed accurately and with sufficient strength. Additionally, consider using support structures to prevent sagging or deformation during printing.
Use the Right Printing Technique
There are several printing techniques that can be used to create threads, such as Fused Filament Fabrication (FFF) or Stereolithography (SLA). Each technique has its own advantages and limitations, so it is important to choose the right one based on your specific requirements. For example, FFF is more suitable for creating functional threads, while SLA is better for producing high-resolution threads with intricate details.
Post-Processing and Finishing
After printing your threads, it is important to post-process and finish them to ensure that they meet your quality standards. This may involve removing support structures, sanding rough surfaces, or applying a coat of paint or sealant to improve the appearance and functionality of the threads. Proper post-processing can enhance the strength and durability of your 3D printed threads.
Case Study: Ultimaker S5 3D Printer
One example of a 3D printer that excels in creating high-quality threads is the Ultimaker S5. This printer offers a large build volume, dual extrusion capabilities, and a heated build plate, making it ideal for printing complex parts with precise threads. With its user-friendly interface and reliable performance, the Ultimaker S5 is a popular choice among professionals and hobbyists alike.
Conclusion
3D printing threads can be a challenging task, but with the right tools, materials, and techniques, you can achieve excellent results. By following the tips outlined in this article, you can create strong, accurate, and functional threads that meet your specific requirements. Remember to choose the right design software, select the appropriate material, optimize your printing settings, use the right printing technique, and post-process your threads for the best results. With practice and experimentation, you can master the art of 3D printing threads and unlock new possibilities in manufacturing.


